


Walls and surfaces settings in Orca Slicer
The walls and surfaces settings control how Orca Slicer prints the perimeters of your model and the order it lays them in. Most of the time the defaults are right, but two choices here, the wall printing order and the one-wall options, make a real difference to how clean and how strong your walls come out.
This page explains each setting and, more usefully, which one to pick for the result you want.
Wall printing order
This is the setting in Orca Slicer that decides whether your walls come out smooth or strong, because the two pull in opposite directions. The order controls whether the inner or outer wall prints first.
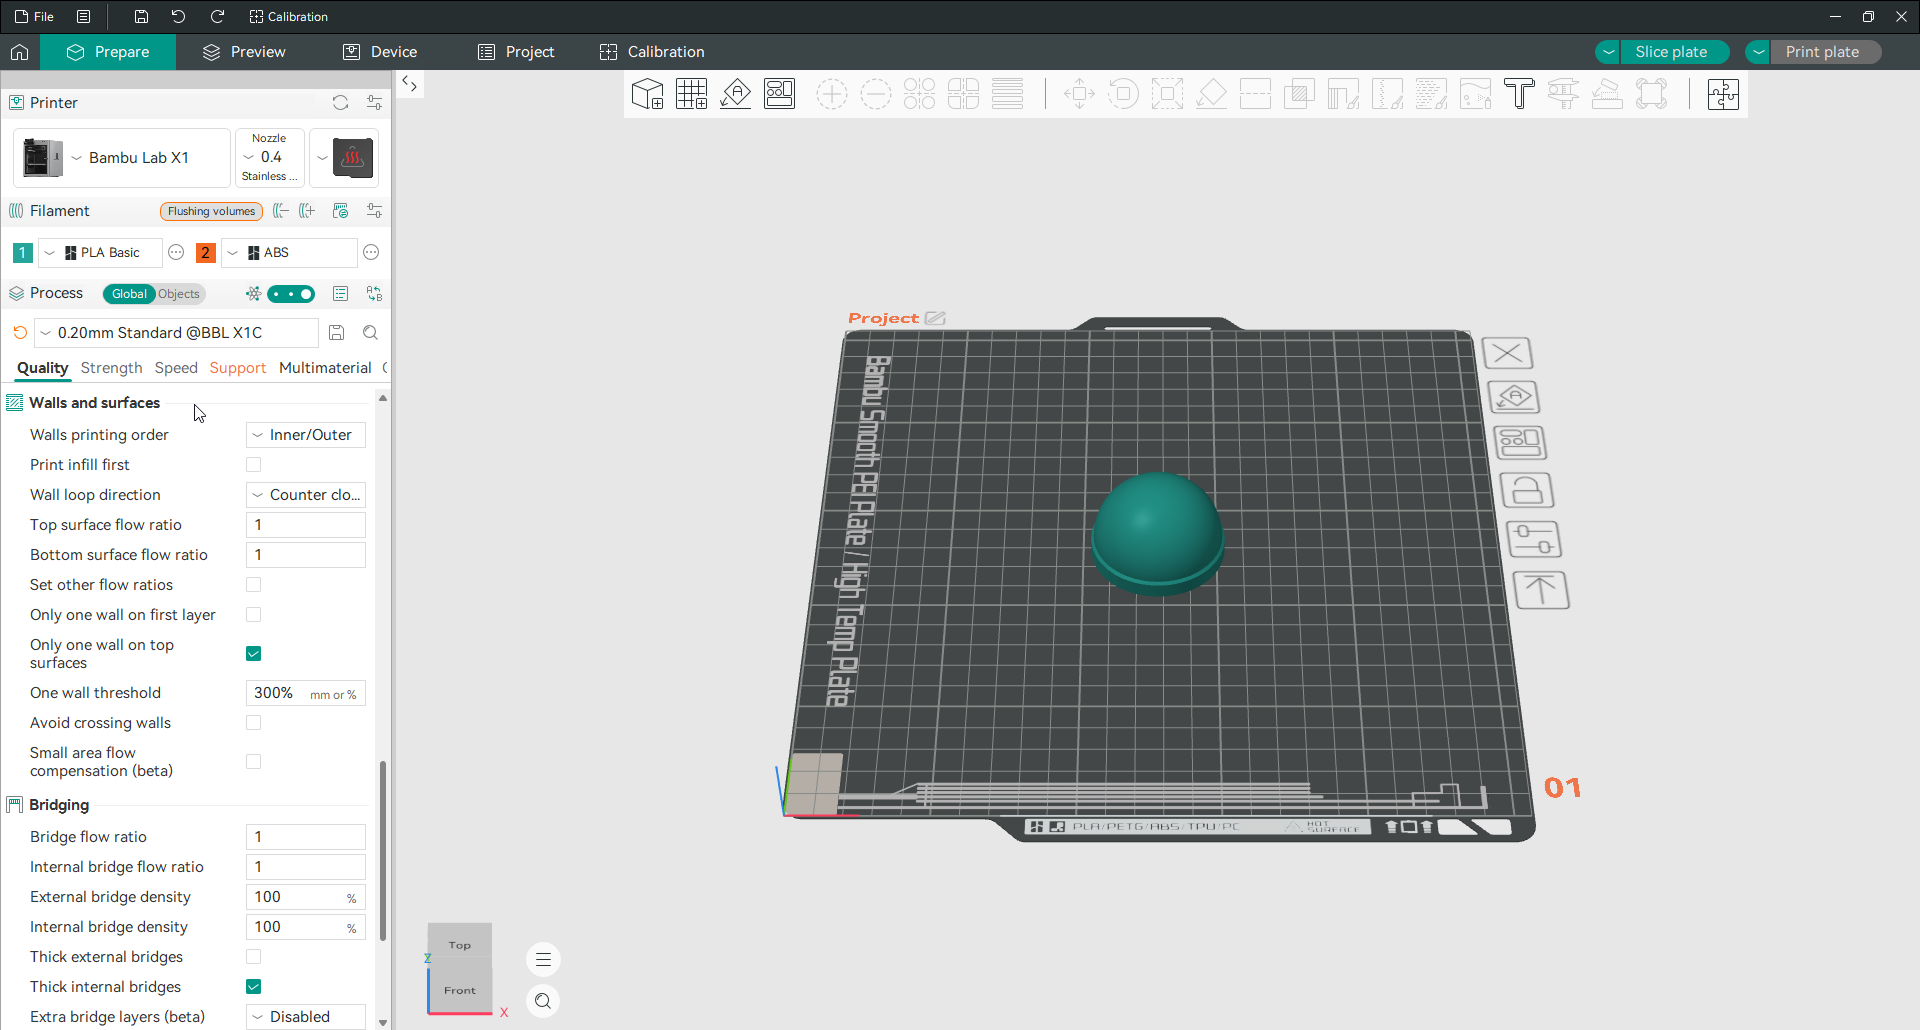
Inner/Outer prints the inner wall first, then the outer. This backs the outer wall with support as it prints, which helps overhangs stick and makes the part stronger. The trade is a slightly rougher outer surface, because the inner wall can push against the outer one and deform it a little.
Inner/Outer/Inner prints the outer wall sandwiched between inner walls, which gives the cleanest, most accurate surface. It needs at least three walls to work. The catch is that overhangs suffer, because the outer wall goes down before it has inner support behind it.
Outer/Inner prints the outer wall first, giving surface quality and accuracy close to Inner/Outer/Inner. Its downside is a less tidy Z-seam, since the seam is laid on the visible surface first. The seam settings can help place it where it shows least.
The simple rule: choose Inner/Outer for parts with overhangs or that need strength, and Inner/Outer/Inner for display pieces where the surface is the point.
Print infill first
With this on, Orca Slicer prints the infill and solid layers before the walls. It can help supported and overhanging designs. But the infill can push the outer walls outward as it cools, an effect sometimes called infill ghosting. If you use it, pair it with Precise wall, the Inner/Outer/Inner order, and a reduced infill/wall overlap to stop the infill pressing through the surface.
Wall loop direction
This sets the direction the wall loops travel when viewed from above. By default all loops print anticlockwise, unless Reverse on even is enabled. You can force a specific direction instead of Auto, and the printer follows it unless Reverse on even is on.
This is automatically disabled in vase or spiral mode, because those print one continuous wall rather than separate loops. For nearly everyone, leaving this on Auto is the right choice in Orca Slicer.
Surface flow ratio
Surface flow ratio controls how much filament goes into the top and bottom solid layers. Nudging it slightly below 1.0 can smooth the top surface and cut small blobs, because a touch less material leaves a cleaner face.
The actual flow is this ratio multiplied by your filament’s flow ratio, so it stacks on your existing calibration. As with any flow change, calibrate your base flow rate first before moving this off 1.0.
Only one wall settings
These let a surface print with a single wall to free up space for the top infill pattern.
The main option, only one wall on top surfaces, is genuinely useful on small flat areas and fine detail like embossed letters. Several walls would crowd out the top pattern there and leave it patchy. A single wall gives the infill room to cover the surface evenly. Do not use it on parts that need strength, since one wall is weaker.
There is a matching option for the first layer, and a one wall threshold that sets how small a top surface has to be before this kicks in. You can set the threshold in millimetres or as a percentage of the wall width. On narrow surfaces it can occasionally leave small gaps; setting it to zero disables it for those prints.
Avoid crossing walls
With this on, the nozzle takes a small detour during travel rather than crossing a printed wall. That keeps it from scratching the surface as it moves, which matters most on visible faces and stringy materials like PETG and TPU.
It adds a little print time. The max detour length limits how far the nozzle will go out of its way to avoid a crossing: set it in millimetres, as a percentage of the direct path, or to 0 for no limit. A larger detour avoids more crossings but costs more time, so it is a balance.
Small area flow compensation
This reduces the flow in tiny or narrow areas, like the tops of letters, where a normal flow rate would over-extrude and leave a rough, bulging surface. Turning it on lets the slicer trim the flow just enough for those small regions to come out smooth. It is aimed at fine text, logos and decorative detail where surface quality matters more than speed.
Frequently asked questions
What is the best wall order in Orca Slicer?
Inner/Outer for parts with overhangs or that need strength, because the inner wall supports the outer as it prints. Inner/Outer/Inner for display pieces, because it gives the cleanest outer surface, though it needs at least three walls and handles overhangs less well.
What does Inner/Outer/Inner do?
It prints the outer wall between two inner walls, so the outer surface comes out smooth and dimensionally accurate. It requires three or more walls and is weaker on overhangs, since the outer wall prints before it has inner support.
Why is my outer wall wavy or rough?
Often slight over-extrusion on the outer perimeter. Enable “Set other flow ratios” and lower the outer wall flow a little, which sharpens the surface without weakening the infill. Calibrate your base flow first.
What is “only one wall on top surfaces” for?
It prints a single wall on small flat surfaces so the top infill pattern has room to cover them evenly. It helps most on fine detail like embossed text. Avoid it on parts that need strength.
Should I turn on avoid crossing walls?
Yes for visible or stringy prints (PETG, TPU), because it stops the nozzle marking the surface as it travels. It adds a little time, controlled by the max detour length. For fast functional prints where surface marks do not matter, you can leave it off.