


Orca Slicer wall count, explained
Wall loops set how many perimeters the printer draws around the outside of each layer, and they are the single biggest lever for how strong a print is. Each loop is a full outline, so more of them means thicker, stronger walls, while fewer save time and plastic. For most parts, wall count does more for strength than turning up the infill, and it prints faster too. Orca Slicer keeps the setting simple, with a few extra options for tricky shapes.
You will find them in the Strength tab, in the Walls section.
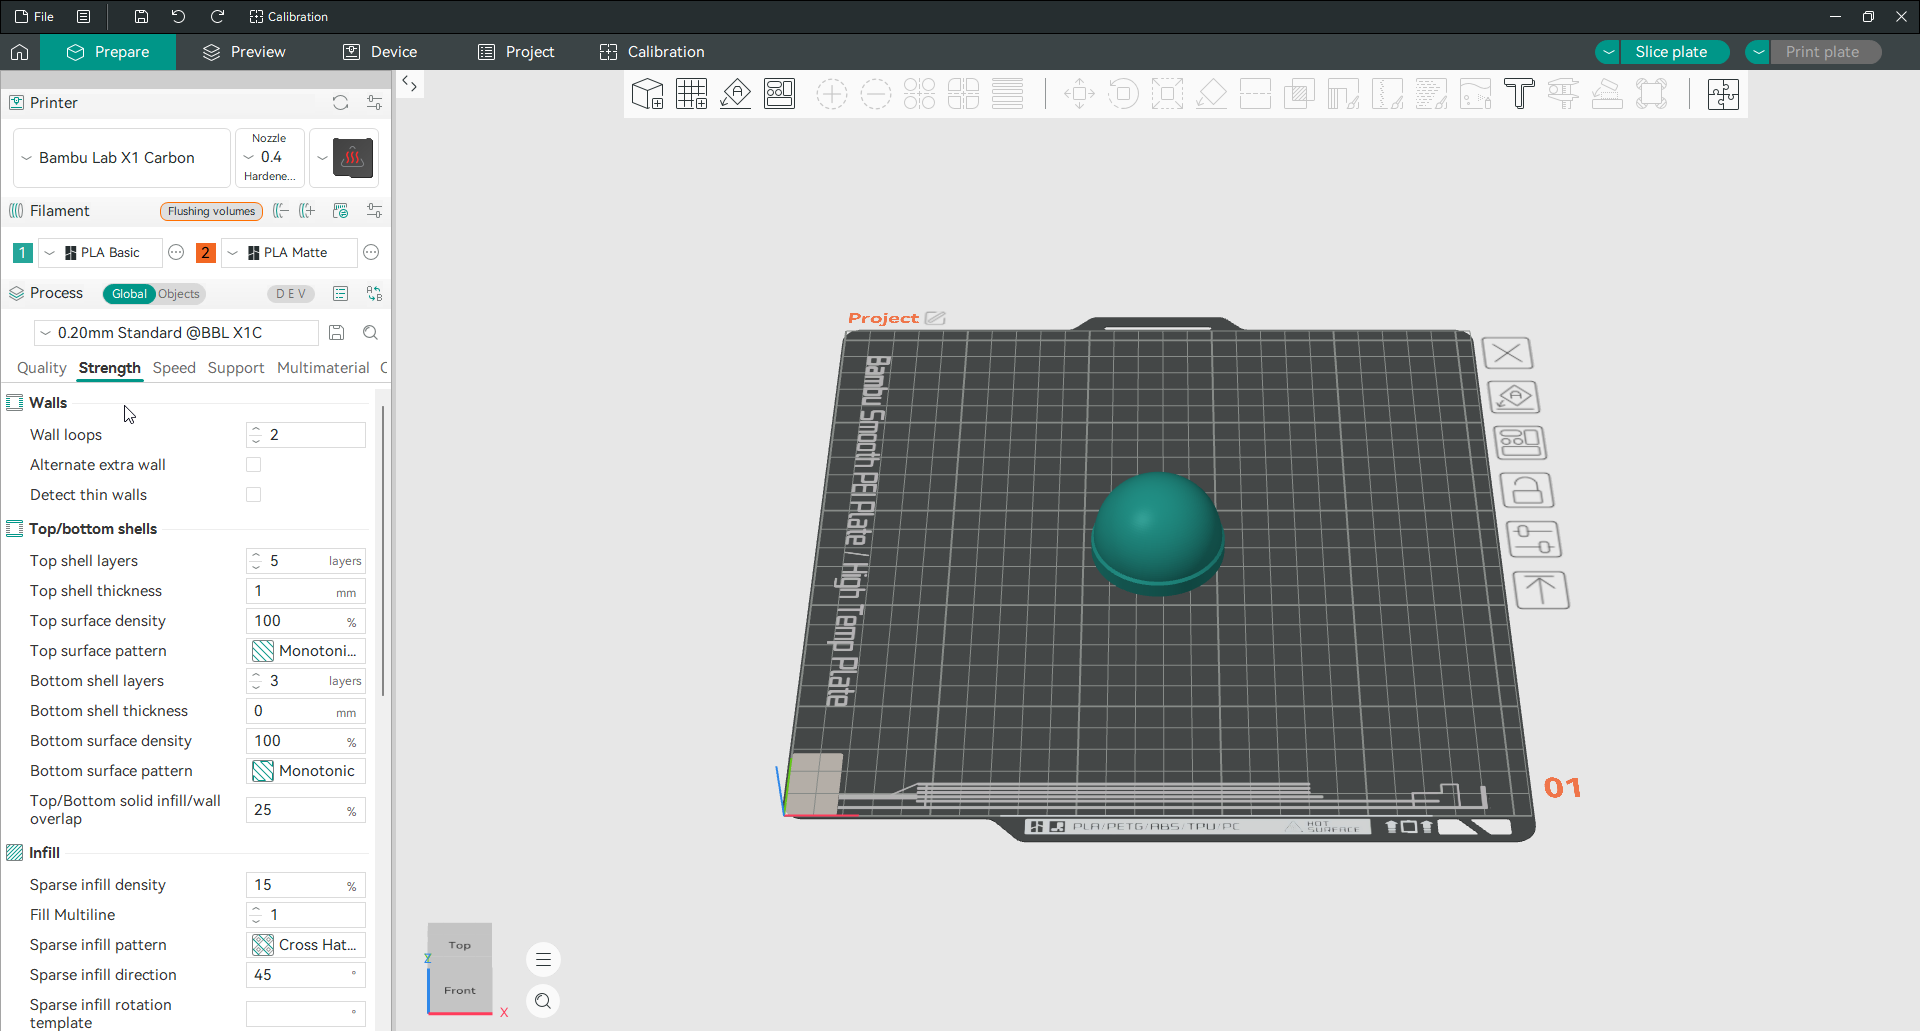
Wall loops
Wall loops is the number of perimeters on each layer, and the default is 2. That is fine for decorative models where strength does not matter. For functional parts that take some load, three walls is a better baseline, and load-bearing parts do well with four. Beyond that, adding walls usually buys more strength than raising infill. Solid perimeters carry load better than a sparse lattice. The trade is time and material, so match the count to the job: two for looks, three for general use, four or more for parts that have to hold up.
The outer of these walls is the visible surface, and the inner ones are hidden. That is why the speed settings let you print the outer wall slower for a clean finish while the inner walls run fast. How the walls are generated and ordered is covered on the wall generator and walls and surfaces pages, and their width on the line width page.
Alternate extra wall
Alternate extra wall adds one extra wall on every other layer, so the infill gets wedged vertically between the perimeters. That locks the layers together and makes the part noticeably stronger without adding a full wall to every layer. It needs the ensure vertical shell thickness option turned off to work. It also does not suit Lightning infill, which has too little material for the extra wall to anchor to. Reach for it on functional parts where you want more strength without the full weight of another wall everywhere.
Detect thin walls
Detect thin walls handles parts of a model that are too narrow to fit two lines of plastic, such as thin fins or embossed text. Normally walls print as closed loops, and a gap too thin for two lines gets skipped. With this on, the slicer prints that gap as a single line instead, so the thin feature appears. Those single-line walls are weaker and a little rougher because they are not closed loops. The better fix for most people is the Arachne wall generator. It handles thin features with variable-width walls and turns this setting off, so consider switching to it before relying on this.
Frequently asked questions
How many walls should I use in Orca Slicer?
Two walls suit decorative prints, three are a good baseline for functional parts, and four or more suit load-bearing parts. The default is 2. Adding walls is usually more effective for strength than raising infill, so reach for extra walls first when a part needs to be tougher.
Do walls or infill matter more for strength?
Walls, in most cases. Solid perimeters carry load better than a sparse infill lattice, so going from two walls to four does more for strength than a big jump in infill density, and it prints faster. Use infill to fill volume and resist crushing, and use walls for overall toughness.
What does alternate extra wall do?
It adds an extra wall on every other layer, wedging the infill vertically between the perimeters so the layers lock together and the part is stronger. It needs ensure vertical shell thickness turned off, and it does not work well with Lightning infill. It is a good middle ground when you want more strength without a full extra wall on every layer.
Should I use detect thin walls or Arachne?
Arachne is usually the better choice. Detect thin walls prints narrow features as a single weaker line, while the Arachne wall generator handles thin walls with variable-width perimeters that are stronger and cleaner. Switch to Arachne on the wall generator page rather than relying on detect thin walls, unless you have a reason to stay on the classic generator.