


Orca Slicer brim and skirt, explained
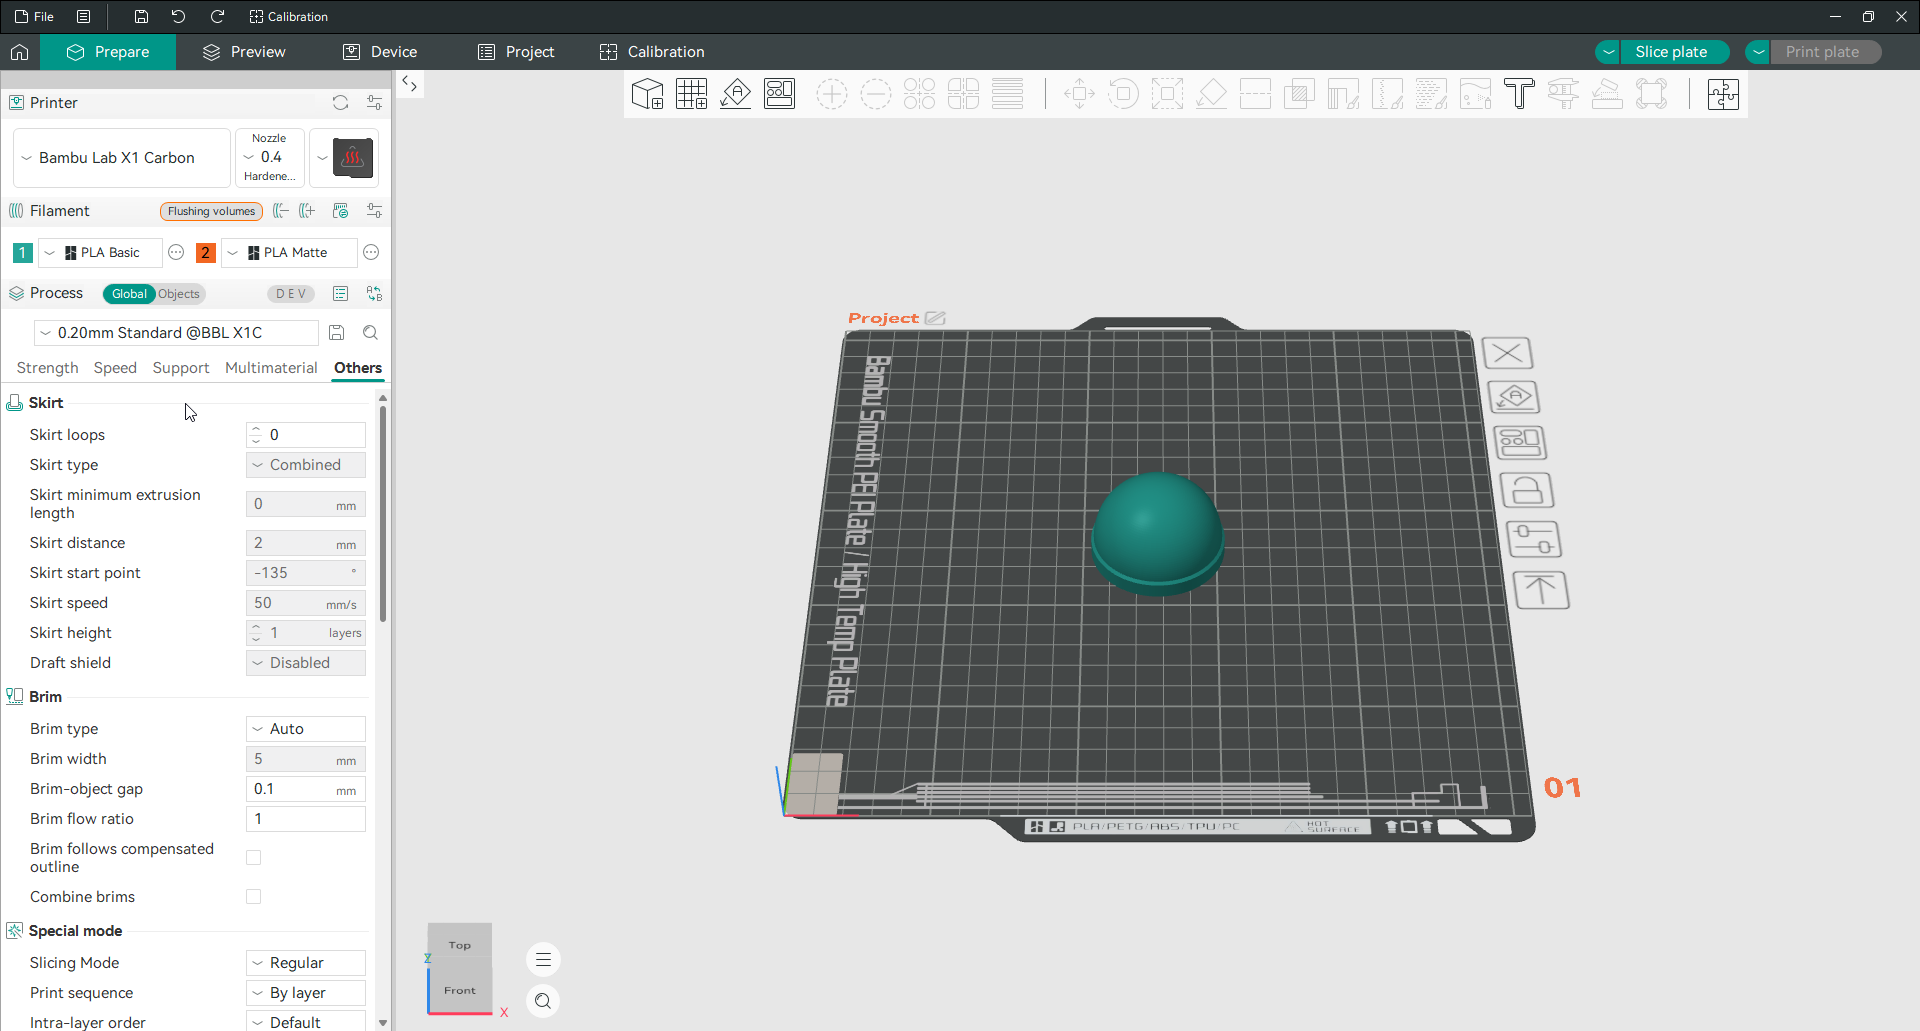
A brim and a skirt are two lines the printer draws around a model on the first layer, and they do very different jobs. A brim attaches to the base of the print to hold it down and stop it warping or lifting. A skirt is a loop printed a short distance away that never touches the model, used to prime the nozzle before the real print starts. Both live in the Others tab, and a brim is the one you reach for when a print keeps peeling off the plate.
You will find them in the Others tab, in the Brim and Skirt sections.
Brim
A brim is a flat skirt of extra outlines joined to the bottom edge of the print, which widens the base and grips the plate. It is the standard fix for corners lifting, tall thin parts toppling, and small footprints that will not stay stuck.
Brim type sets where it goes. Auto lets Orca Slicer work out a sensible width from the model and material. Outer brim only puts it around the outside, which is easiest to remove. Inner brim only fills holes and enclosed areas instead, which is harder to remove but hides the removal mark. Outer and inner brim does both for the most adhesion, at the cost of the most cleanup. There are also mouse ears, small tabs of brim placed only at the corners, which fight warping while using far less material than a full brim.
Brim width, around 5 mm by default, sets how wide the brim reaches, and 5 to 8 mm helps parts that stick badly. Brim-object gap is the small space between the brim and the model, where a larger gap makes removal easier but weakens the hold, and a gap of zero attaches it firmly. Brim flow ratio nudges how much plastic the brim uses, and a value a little above 1 helps it grip, though it makes the brim harder to peel off.
Skirt
A skirt is one or more loops printed around the model without touching it, a layer or two high. Its job is to get filament flowing smoothly and let you check the first layer before the print proper begins, so the first real line is clean. Skirt loops sets how many go down, with zero turning it off, and skirt distance sets how far from the model it sits.
A skirt can also become a draft shield, a tall skirt printed up the full height of the model. That wall of plastic blocks drafts and holds warm air around the print, which helps warp-prone materials like ABS and ASA in an open printer. Turn the draft shield on only when you are fighting warping from cool air, since it adds time and material.
Frequently asked questions
What is the difference between a brim and a skirt in Orca Slicer?
A brim attaches to the base of the print to improve bed adhesion and stop warping, so it is the one to use when parts lift or fall over. A skirt is a separate loop that does not touch the model, used to prime the nozzle and check the first layer. Only the brim helps a print stay stuck.
What brim type should I use?
Outer brim only is the usual choice, since it grips well and peels off easily. Use outer and inner brim for the most adhesion on tricky parts, at the cost of harder cleanup, and inner brim only when you need to hide the removal mark. Mouse ears are a light option that fights corner warping with little material.
How wide should my brim be?
Around 5 mm suits most prints, and 5 to 8 mm helps parts that stick badly or warp at the corners. Wider grips harder but uses more plastic and takes longer to remove. If a small part still lifts at 8 mm, a raft or better bed preparation is usually the next step.
What is a draft shield for?
A draft shield is a tall skirt that surrounds the whole print to block cool drafts and trap warm air, which reduces warping on materials like ABS and ASA in an open-frame printer. It costs extra time and filament, so use it only when cool air is causing corners to lift.