


Layer height settings in Orca Slicer
Layer height is the thickness of each printed layer, and it is the single setting that most decides how your print looks and how long it takes. Thinner layers give smoother curves and finer detail but take longer. Thicker layers finish faster and show more visible stepping. Getting it right is mostly a matter of matching it to your nozzle.
This page explains what to set, the simple rule behind it, and the two related settings, first layer height and variable layer height, that people usually need next.
What layer height controls
Every print is built from stacked layers, and their thickness is the layer height. It shapes three things at once: the surface finish, the print time, and to a smaller degree the strength of the part.
Drop the layer height and the ridges between layers shrink until they are hard to see, which is what you want on a display piece. Raise it and each layer lays down more plastic, so the print finishes in fewer passes, which is what you want on a rough draft or a bulky functional part. Almost every quality-versus-speed decision in slicing starts here.
The rule: 20 to 80 percent of your nozzle
Layer height is tied to nozzle diameter, and the usable range is 20 to 80 percent of it.
Stay inside that range and the layers bond well and extrude cleanly. Stray outside it and problems appear:
Below 20 percent, so little plastic comes out per pass that the flow turns inconsistent, and you get a “fish scale” pattern on the walls, especially at high speed. On a 0.4 mm nozzle that means going thinner than about 0.08 mm starts to cause trouble.
Above 80 percent, the layers no longer squash into each other enough to bond, so adhesion weakens and the surface roughens. On a 0.4 mm nozzle that is anything over about 0.32 mm.
For most prints, 0.20 mm on a 0.4 mm nozzle is the sweet spot, and it is worth using on any test model so your results line up with what everyone else prints.
Quick reference by nozzle size
Match your nozzle to find a safe range and a sensible first layer:
| Nozzle | Min (20%) | Max (80%) | First layer |
|---|---|---|---|
| 0.2 mm | 0.04 mm | 0.16 mm | 0.12 mm |
| 0.3 mm | 0.06 mm | 0.24 mm | 0.18 mm |
| 0.4 mm | 0.08 mm | 0.32 mm | 0.25 mm |
| 0.5 mm | 0.10 mm | 0.40 mm | 0.30 mm |
| 0.6 mm | 0.12 mm | 0.48 mm | 0.35 mm |
| 0.8 mm | 0.16 mm | 0.64 mm | 0.45 mm |
| 1.0 mm | 0.20 mm | 0.80 mm | 0.55 mm |
These are the outer limits. In practice most people sit near the middle: 0.12 mm for fine detail, 0.20 mm for everyday prints, 0.28 to 0.32 mm for fast drafts on a 0.4 mm nozzle.
First layer height
The first layer height is set on its own, separately from the rest of the print, because it does a different job. It is the foundation, and its only real task is to grip the bed.
A thicker first layer pushes more plastic into the build surface and forgives a bed that is slightly uneven or a Z offset that is a fraction off. That is why it is usually set thicker than the layers above it. The recommended value is around 0.25 mm on a 0.4 mm nozzle, about 62.5 percent of the nozzle diameter, and it is best not to go past 65 percent or adhesion starts to suffer.
If your first layer will not stick, a slightly thicker first layer is one of the first things to try, alongside checking your Z offset. If it sticks too hard and bulges at the base, that is elephant foot, which the precision settings handle with elephant foot compensation.
How layer height affects overhangs
Layer height quietly changes how well your printer handles overhangs, the parts that lean out past the layer beneath them.
With a smaller layer height, each new layer only has to reach out a short distance beyond the one below, so it has more to hold on to. Overhangs come out cleaner and steeper angles become printable. With a larger layer height, each layer juts further into open air, adhesion suffers, and shallow overhangs start to sag or need supports. If a model is fighting you on its overhangs, dropping the layer height often helps more than any support setting.
Variable layer height
You do not have to use one layer height for the whole model. Orca Slicer can vary it through the height of a single print: thin layers where the surface is curved and detailed, thick layers where it is straight and plain.
This is the best of both worlds on the right model. A tall object with a smooth domed top and a simple body can print the body fast at 0.28 mm and the dome fine at 0.12 mm, in one job. The full walkthrough is in the guide, under variable layer height.
One limitation to know: if you are printing in more than one colour or material, every object on the plate has to share the same layer height, so variable layer height is unavailable in that case.
Where to set it in Orca Slicer
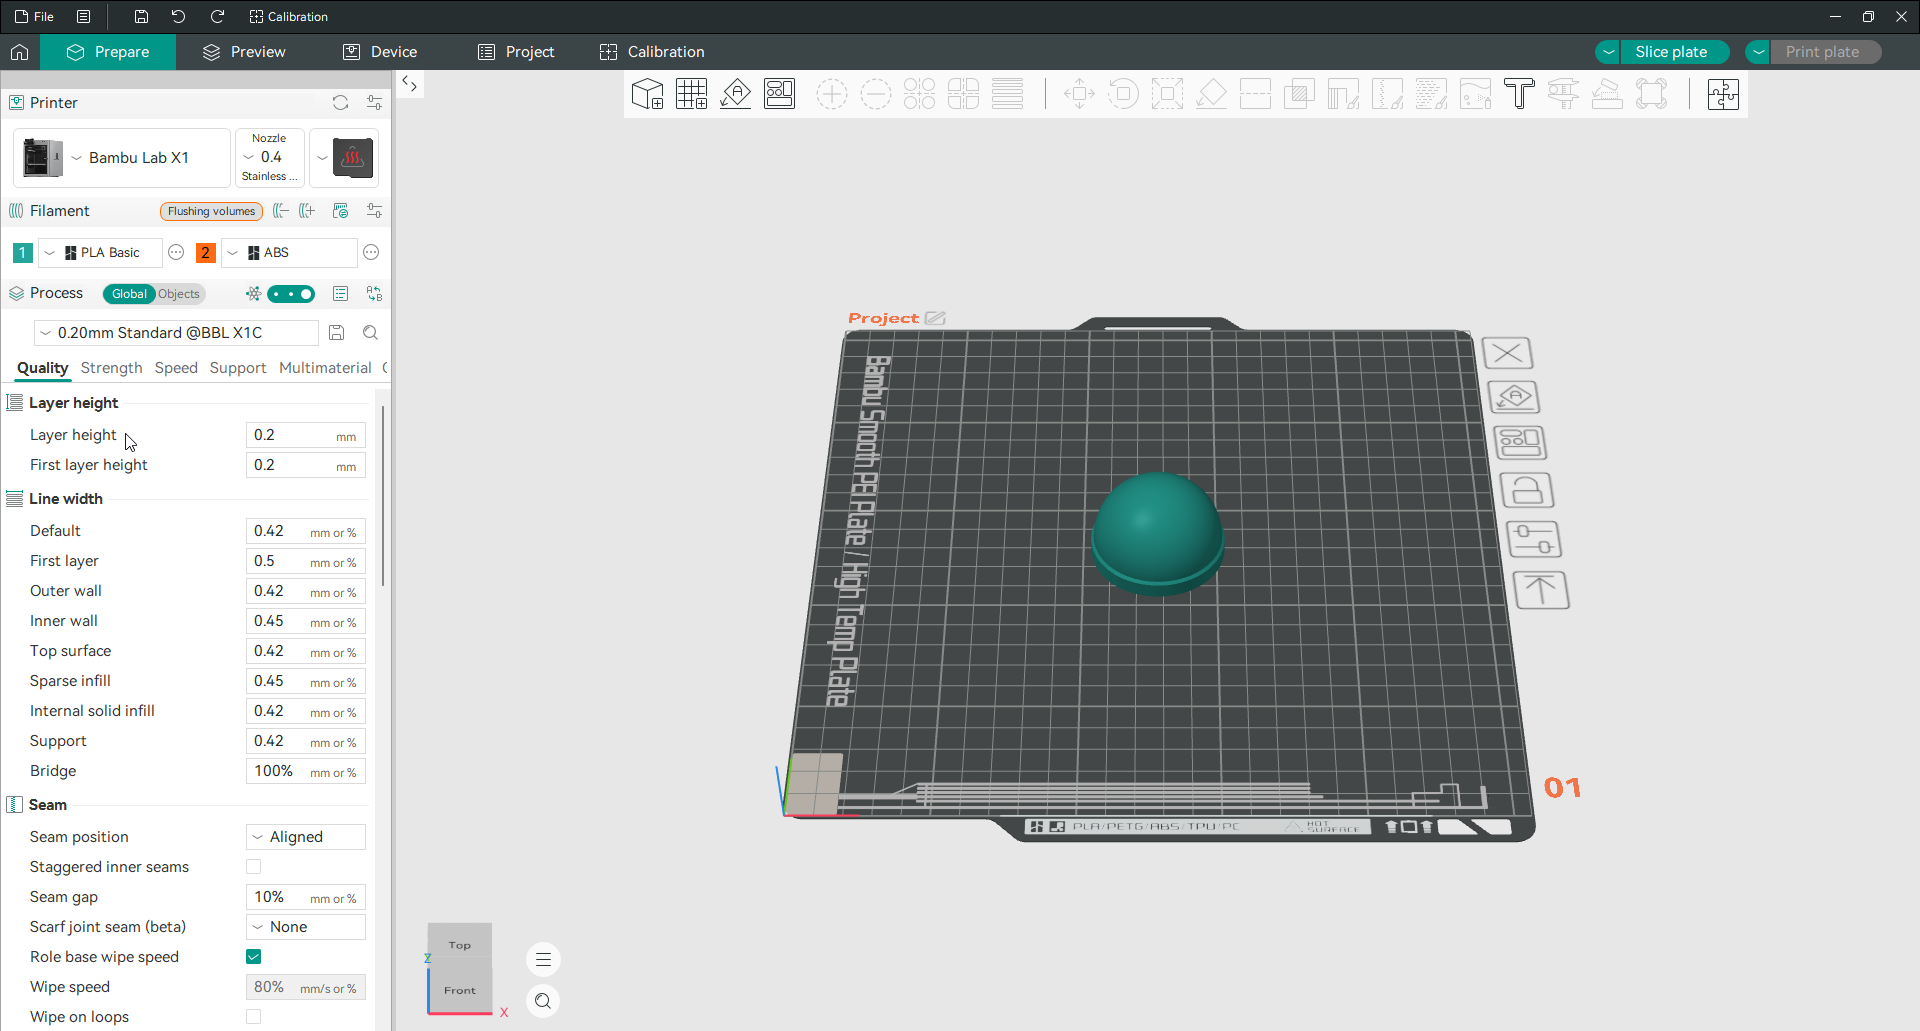
Layer height and first layer height sit at the very top of the Quality tab in your process settings.
- Open the Quality tab in the process (left) panel.
- The Layer height and First layer height fields are the first two settings.
- Type your value in millimetres.
- Keep it inside the 20 to 80 percent range for your nozzle.
That is all it takes. For the settings people usually adjust next, see line width and the walls and surfaces page.
Frequently asked questions
What layer height should I use in Orca Slicer?
For a 0.4 mm nozzle, 0.20 mm is the best all-round choice. Use 0.12 mm for detailed or display prints, and 0.28 to 0.32 mm for fast drafts. The general rule is to keep layer height between 20 and 80 percent of your nozzle diameter.
What is the best layer height for a 0.4 mm nozzle?
0.20 mm for everyday prints, which balances surface quality and speed. The usable range is 0.08 to 0.32 mm. Go thinner for fine detail, thicker for speed.
What first layer height should I use?
Around 0.25 mm on a 0.4 mm nozzle, which is thicker than the rest of the print on purpose to grip the bed better. Do not exceed about 65 percent of your nozzle diameter, or adhesion starts to suffer.
Why does my print have a fish scale pattern?
The layer height is too low for your print speed, usually under 20 percent of the nozzle diameter. Raise the layer height or slow the print down and the pattern goes away.
Can I use different layer heights in one print?
Yes, with variable layer height. Orca Slicer can print thin layers on curved sections and thick layers on plain ones in the same job. It is unavailable only when you are printing more than one colour or material.