


Orca Slicer speed settings, explained
Speed settings decide how fast the nozzle moves for each part of a print, and they trade print time against quality. The trick is that not every part needs the same speed. The outer wall, which you see, benefits from going slower, while the infill hidden inside can race. Orca Slicer splits speed into a separate value for each feature. That lets you be quick where it does not show and careful where it does. Set them well and prints come out clean without taking any longer than they need to.
You will find them in OrcaSlicer’s Speed tab, grouped by first layer, other layers, overhangs, travel, acceleration and jerk.
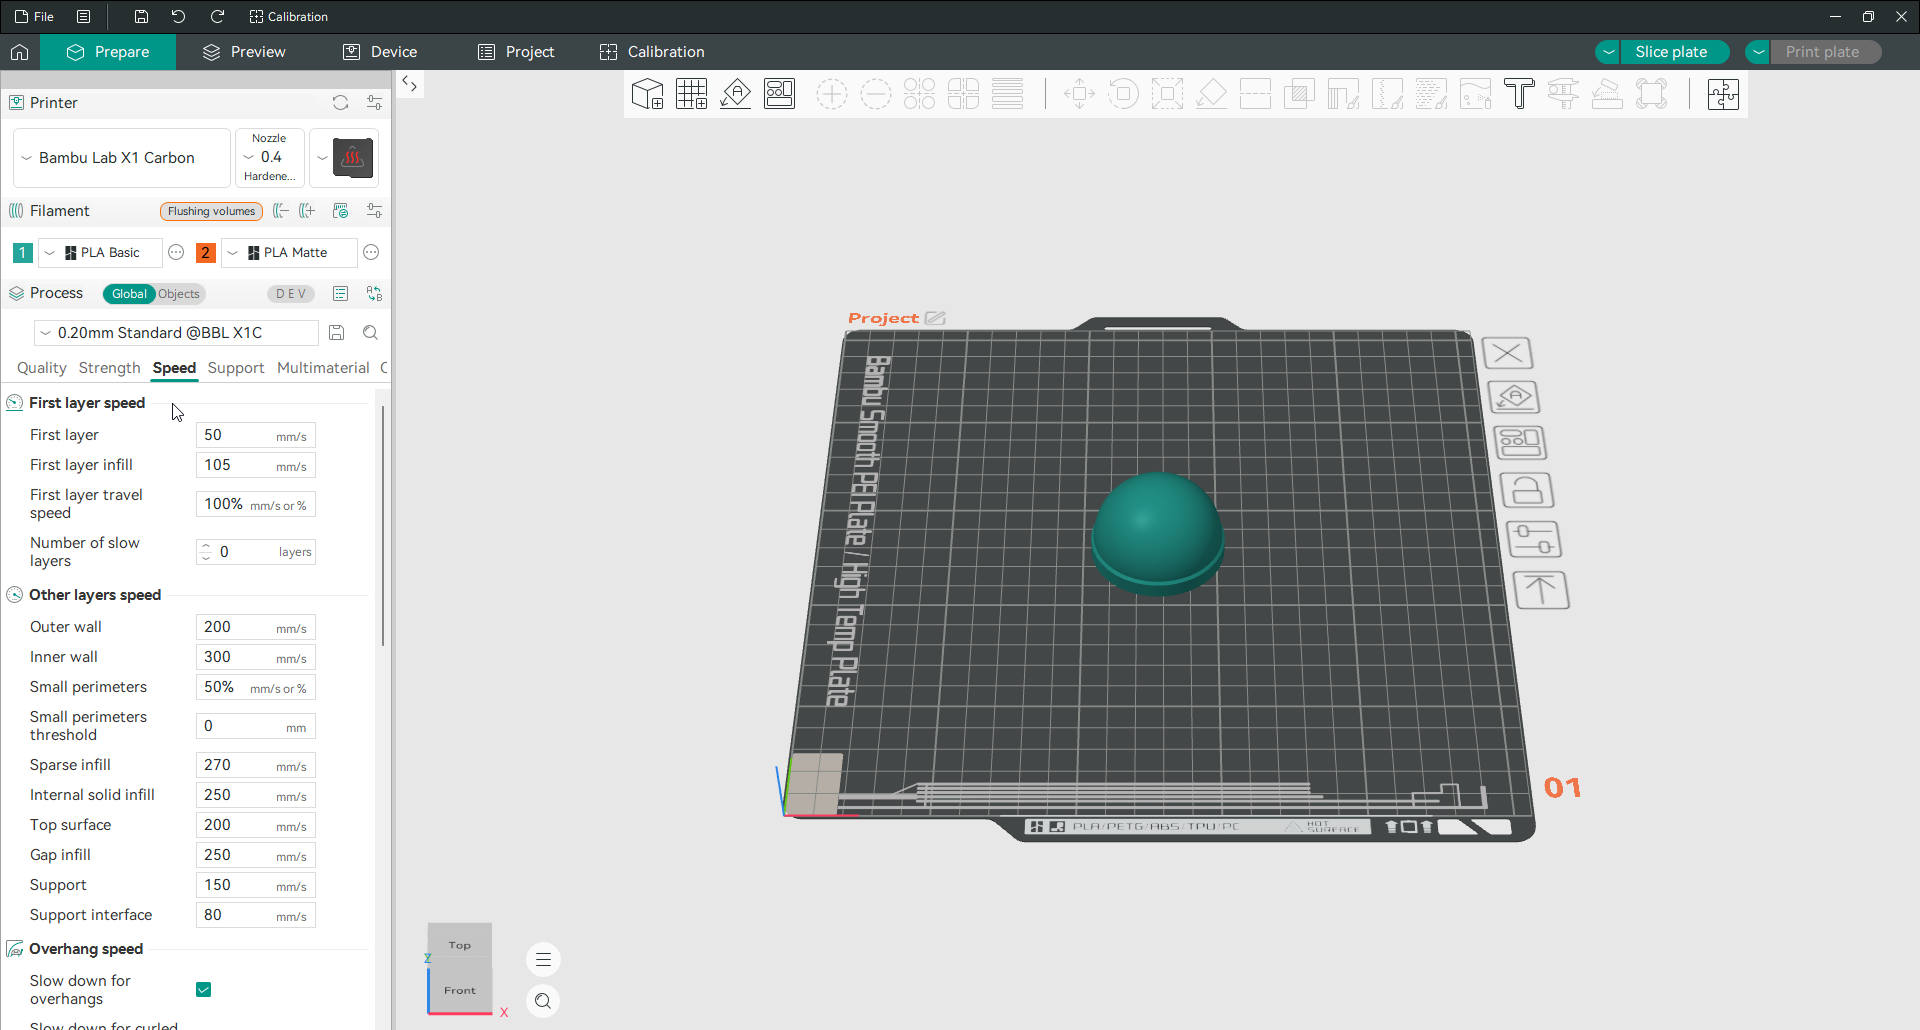
First layer speed
The first layer is printed slowly on purpose, so it presses down and sticks to the plate. A first layer speed around 60 mm per second, or slower on a tricky surface, gives the plastic time to bond. Number of slow layers extends that careful pace beyond the first layer, easing the print up to full speed over the next few layers rather than jumping straight to it, which helps adhesion hold as the part grows.
The feature speeds
In Orca Slicer the Other layers group is where most of the speed is set, one value per feature. The single most important one is the outer wall speed, because that surface is the one you see. Printing the outer wall slower gives a smoother finish, sharper corners and cleaner overhangs, so it is the last place to chase speed. The inner wall can run much faster since it is hidden. The sparse infill can be faster still, because nothing rests on its surface. The top surface is printed slower again for a clean, even finish. Gap fill, support and support interface each get their own pace. The takeaway is simple: slow the outer wall and the top surface, and let everything hidden run quick.
There is a real ceiling on all of this. However high you set these numbers, the print can only go as fast as the hotend can melt plastic, which is the maximum volumetric speed. If prints look under-extruded when you speed them up, that limit, not the speed setting, is usually the cause.
Overhang speed
Overhang speed slows the nozzle over unsupported areas so each layer has time to cool and set before the next lands. Slow down for overhangs turns it on. A small table then sets the speed for each level of overhang, so the more unsupported a line is, the slower it prints. This works hand in hand with the settings on the overhangs page, and it is one of the most effective ways to clean up drooping overhangs. Slow down for curled perimeters does something similar for edges that start to lift and curl. Bridge speed, just below, sets how fast the nozzle crosses open spans. It is usually slower than normal so the bridge has time to firm up.
Travel speed
Travel speed is how fast the nozzle moves when it is not printing, between one part of the layer and another. It is set high, often 300 to 500 mm per second, because faster travel gives the nozzle less time to ooze and cuts the total print time. It does not affect surface quality directly, so there is little reason to keep it low unless your printer skips steps at high travel speeds.
Acceleration
Acceleration is how quickly the printer speeds up and slows down, and it matters as much as the raw speed. Push it too high and you get ringing, the faint echo of ripples you see after a corner or edge. The fix is to give the outer wall a lower acceleration than the rest. The visible surface then stays clean, while infill and inner walls keep their higher values for speed. First layer acceleration is kept low for adhesion. If ringing bothers you, the input shaping calibration tunes the printer’s motion to cancel it. That lets you keep acceleration high without the ripples.
Jerk and extrusion rate smoothing
Jerk, or junction deviation on some firmware, controls how sharply the printer can change direction without slowing to a stop. Lower jerk makes direction changes gentler, which reduces ringing and vibration at corners, at a small cost in speed. The defaults are conservative and rarely need changing. Extrusion rate smoothing, in the Advanced group, eases sudden changes in how much plastic is pushed. That helps hold quality on very fast printers, where flow has to ramp up and down quickly.
Frequently asked questions
What is the most important speed setting in Orca Slicer?
Outer wall speed. It is the surface you see, so printing it slower gives a smoother finish, sharper corners and cleaner overhangs. Slow the outer wall and the top surface for looks, and let the hidden inner walls and infill run fast to save time.
Why should I slow down the outer wall?
Because the outer wall is the visible surface, and speed shows up there as rougher walls, rounded corners and worse overhangs. Slowing it gives the plastic time to lay down cleanly. The inner wall and infill are hidden, so they can stay fast without anyone seeing the difference.
Does printing faster reduce quality?
It can, but not evenly. The parts that show, like the outer wall, top surface and overhangs, lose quality first when rushed, while hidden infill and inner walls tolerate high speed fine. High acceleration also causes ringing on walls. The goal is to be fast where it does not show and careful where it does.
What is a good travel speed?
Travel speed can be high, often 300 to 500 mm per second, because the nozzle is not printing during travel, and moving quickly gives it less time to ooze and shortens the print. Only lower it if your printer loses position or skips steps at high travel speeds.
Why do my walls have ripples or ghosting?
That is ringing, caused by acceleration or jerk set too high for your printer’s rigidity, which leaves a faint echo after each corner. Lower the outer wall acceleration for a cleaner surface, or run the input shaping calibration to cancel the vibration so you can keep speed high without the ripples.