


Wall generator settings in Orca Slicer
The wall generator decides how Orca Slicer turns each layer’s outline into the wall loops your printer actually draws. There are two of them, Classic and Arachne, and the choice affects how well fine detail and thin features come out. It is one setting, near the top of the Quality tab, but the second option hides a handful of controls that only appear once you pick it.
This page explains the difference in plain terms, when to use each, and what every Arachne setting does.
Classic vs Arachne
The whole decision comes down to one thing: whether every wall has to be the same width, or whether the slicer is allowed to vary it.
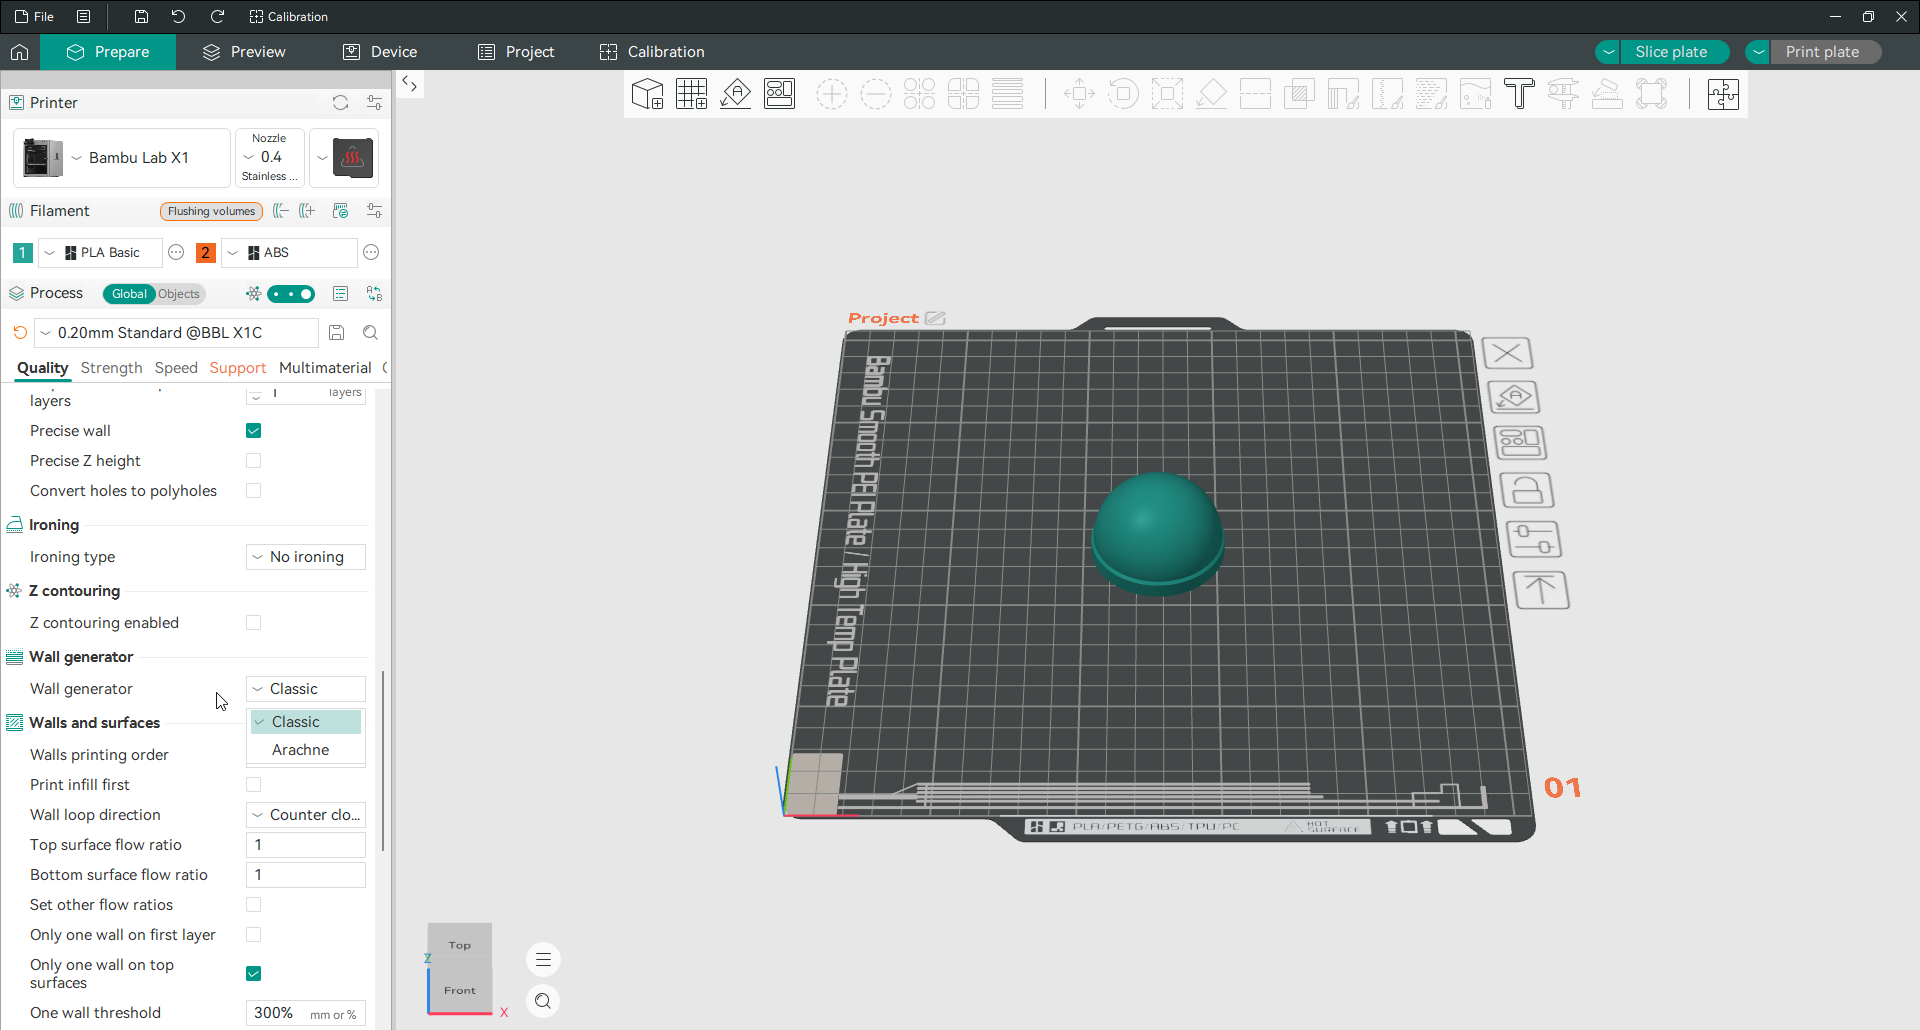
Classic
Orca Slicer’s Classic generator prints every wall at one fixed line width. The extrusion stays constant from start to finish and does not adapt to the shape of the model.
That makes it predictable and fast, which is why it is the default and why it suits most everyday prints. Its one weakness is that a region thinner than the wall width simply gets skipped. Classic has no way to squeeze a narrower line in. On a model with fine ribs or embossed text, those features can vanish.
Best for: simple, regular models and fast prints where fine detail is not the priority.
Arachne
Arachne varies the wall width dynamically to follow the shape of the model. Where a feature is too thin for a full-width line, it prints a narrower one instead of dropping the feature. It also blends smoothly between different wall counts rather than jumping between them.
The result is better dimensional accuracy on fine detail, fewer gaps in thin areas, and cleaner transitions. The trade is a little more complexity and slightly larger G-code. Arachne is based on published research into adaptive-width toolpaths, and it is the same generator PrusaSlicer adopted as its default.
Best for: models with thin walls, fine detail, embossed text, or walls that change thickness.
A quick way to choose: if a print is losing small features or thin text, switch to Arachne. For everything else, Classic is fine.
The Arachne settings
When you pick Arachne in Orca Slicer, several extra settings appear. You will rarely need to touch them, but here is what each does.
Wall transitioning threshold angle
This is the angle at which Arachne decides to change between an even and an odd number of walls. In a wedge shape that narrows to a point, a higher angle makes the slicer skip adding a centre wall, while a lower angle adds more of them. Set it too low and you risk over-extrusion in tight corners. A range of 30 to 50 degrees suits most models.
Wall transitioning filter margin
Left alone, Arachne can flip rapidly between, say, two and three walls as a surface changes thickness, which leaves visible seams. This margin is a buffer that stops that flicker. It holds the extrusion width within a tolerance band. The slicer then waits until the thickness has clearly changed before switching wall count. A higher margin means fewer switches and steadier flow, at a small cost to accuracy. Around 10 to 20 percent of the nozzle diameter is a sensible value.
Wall transitioning length
This controls how gradually Arachne blends between a thicker and a thinner wall. Shorter values transition faster but can drop inner walls; longer values are smoother but add a little print time. A moderate value is the safe choice.
Wall distribution count
When wall widths vary, this limits how many walls are allowed to change width. A lower value keeps the outer walls consistent and varies only the inner ones, which protects the visible surface. A value of 2 to 4 balances a clean outside against a good internal fit.
Minimum wall width
This is the thinnest wall Arachne will print, given as a percentage of nozzle diameter. Anything thinner than this is widened up to the minimum rather than skipped. For example, on a 0.4 mm nozzle at 50 percent, no wall prints thinner than 0.2 mm.
First layer minimum wall width
The same idea applied to the first layer alone, where a solid foundation matters most. Keeping this at or slightly above the nozzle diameter helps bed adhesion and gives a stable base.
Minimum feature size
This sets the smallest feature Arachne will attempt, again as a percentage of nozzle diameter. A feature thinner than this is either widened to the minimum or dropped. Around 60 to 80 percent keeps small details while avoiding fragile walls.
Minimum wall length
This is the shortest wall segment the slicer will bother to print. Anything shorter is skipped, which stops it wasting time and filament on tiny disconnected micro-walls. Keep it small enough to preserve real detail but large enough to skip stray fragments.
A note on top surfaces
By design these wall settings do not touch the top and bottom surfaces, to avoid leaving marks on the faces you see. The exception is the One Wall Threshold in the advanced settings, which controls how aggressively a region counts as a top surface and can bring single-wall top surfaces into play.
Tips for cleaner walls
A few things that help more than fiddling with the transition settings:
Calibrate your flow rate before you touch any of this, because good walls start with accurate extrusion. Pair Arachne with the Precise wall option in the precision settings for the sharpest dimensional accuracy. And keep the transition values moderate, since extreme margins are what create the artefacts these settings are meant to prevent.
For how wall width itself is set, see the line width page, and for wall count and print order see walls and surfaces.
Frequently asked questions
Should I use Classic or Arachne in Orca Slicer?
Classic for simple, fast prints, which is why it is the default. Arachne for models with thin walls, fine detail or embossed text, because it varies the wall width to print features that Classic would skip.
What is the Arachne wall generator?
It is a wall generator that adjusts the extrusion width dynamically to match the model’s geometry, instead of using one fixed width. This lets it print thin features and blend smoothly between different wall counts.
Why are thin features missing from my print?
The Classic wall generator skips regions thinner than its fixed line width. Switch to Arachne, which prints a narrower line rather than dropping the feature.
Do I need to change the Arachne settings?
Usually not. The defaults work for most models. The transition threshold angle and filter margin are the two you might adjust, and only if you see seams or missing centre walls on wedge-shaped parts.
Does the wall generator affect top and bottom surfaces?
No, by design, so it does not leave marks on visible faces. The exception is the One Wall Threshold setting, which governs single-wall top surfaces.