


Seam settings in Orca Slicer
The seam is the small vertical scar left where each layer starts and stops. Every print has one, except vase-mode prints that are drawn as a single continuous spiral. You cannot remove a seam, only place it where it shows least or blend it so it barely registers. The seam settings in Orca Slicer are how you do both.
This page covers the two things that matter most, seam position and the scarf joint, plus the smaller settings that clean a seam up, and what to reach for when a seam looks bad.
Seam position
Seam position decides where on the model the seam falls. This is the single biggest lever, and the right choice depends on whether you care more about looks or strength.
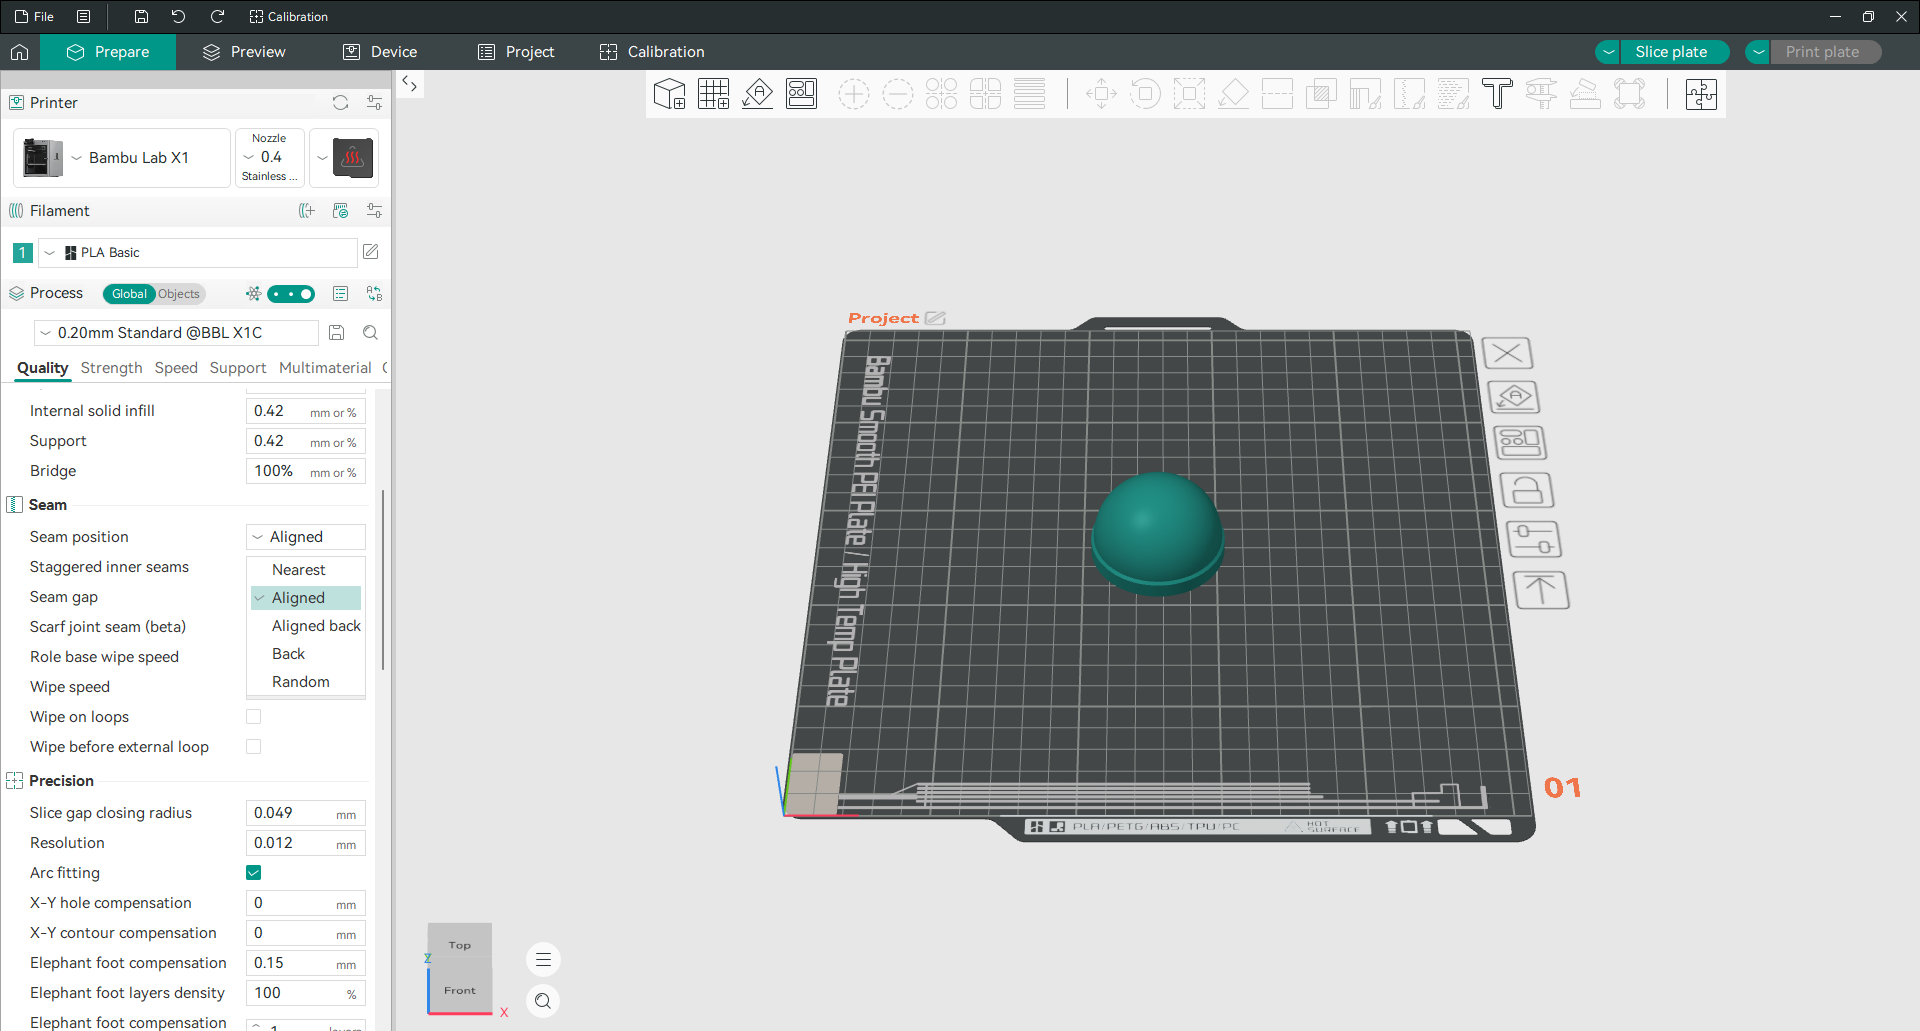
Aligned stacks the seam in one vertical line up the model. It is neat and predictable, and you can rotate the model so that line faces away from view. A good default.
Aligned back is the smarter version of aligning to the rear. It keeps the seam away from the front-facing side while still finding hidden spots for other angles, which makes it the best pick for figurines, sculptures and anything with a clear front.
Back forces the seam to the rear of the model every time. Simple, and useful when the front must stay clean and the back is never seen.
Nearest puts the seam wherever the nozzle already is, which minimises travel and prints fastest. Choose it when speed matters more than a hidden seam.
Random scatters the seam to a different spot on every layer. There is no single line, just a faint speckle, and because the weak point moves around, the part is slightly stronger. This is the one to use for functional parts like a pin that fits through a hole, or to improve water-tightness.
The short rule: Aligned back or Back to hide the seam on display pieces, Random for strength on functional parts, Nearest for speed.
Seam gap
The seam gap is the small distance left between where a loop ends and where it began. It is set in millimetres or as a percentage of the nozzle size.
A larger gap reduces the bulge that builds up where the seam closes; too large and you get a visible gap that looks like under-extrusion. A smaller gap makes the seam less visible but risks a small blob. For a well-tuned printer with pressure advance and retraction dialled in, 0 to 15 percent of the nozzle size is the useful range.
Scarf joint seam
The scarf joint is Orca Slicer’s best tool for an almost invisible seam. Instead of stopping one layer and starting the next abruptly, it ramps the two ends over each other at an angle, like a woodworking scarf joint, so the transition is spread out and blended rather than stacked in one spot.

It is the go-to for smooth, cylindrical models where a normal seam stands out badly, and it has no real downside for strength, if anything it helps slightly. The trade-offs are a little more print time and less benefit on sharp corners or steep overhangs. It is still marked beta in the interface.
Its main sub-settings:
Type is Contour, which applies the scarf to the outer perimeter only, or Contour and hole, which also applies it around holes. There is a conditional option that uses a scarf only where the geometry is curved and a normal seam elsewhere.
Scarf speed should be slow, under 100 mm/s, for a clean blend. If it differs a lot from your wall speeds, turn on extrusion rate smoothing so the change is not abrupt.
Scarf start height sets how far up the layer the ramp begins, as a percentage of layer height. Around 10 to 20 percent is the sweet spot: low enough to blend tightly, high enough to stay precise. At 100 percent it degenerates into an ordinary seam.
Scarf length and steps control how long the ramp is and how finely it is divided. More steps mean a smoother ramp. Ten steps is a sensible default.
The wipe and cleanup settings
Several smaller settings tidy the seam up further.
Staggered inner seam offsets the inner-wall seams so they do not all line up with each other or the outer seam, spreading the weak points and improving strength and water-tightness.
Wipe on loop moves the nozzle slightly inward when a loop finishes, tucking the seam into the part and cleaning the nozzle so it strings less.
Wipe before external loop does a small inward retraction move before the outer wall starts, hiding any small extrusion mark inside the part rather than on the visible surface. It pairs well with the Inner/Outer and Inner/Outer/Inner wall orders.
Fixing a bad seam
If your seams blob, gap or look messy, the fix is usually calibration, not a seam setting.
The biggest single factor is pressure advance. Too little leaves the nozzle pressurised at the seam so it blobs; too much causes under-extrusion and a gap. A pressure advance calibration is the most effective thing you can do for seam quality, and every seam type benefits from it.
After that: raise your travel speed so the nozzle spends less idle time oozing at the seam, enable wipe before the external perimeter, and set the travel distance threshold high enough (around 2 to 4 mm) that short hops do not trigger needless retractions. If the seam blobs at the end of a loop, a slightly larger seam gap absorbs the mechanical slack.
Wall order plays a part too: the Inner/Outer/Inner order keeps the travel to the outer wall short, which gives a tighter, cleaner seam than starting on the outer wall. See the walls and surfaces page for that.
Frequently asked questions
What is the best seam setting in Orca Slicer?
For display pieces, Aligned back or Back to hide the seam at the rear, or the scarf joint seam to blend it away almost completely. For functional parts, Random spreads the weak point and adds a little strength. Nearest is fastest but makes the seam most visible.
How do I hide the Z-seam in Orca Slicer?
Set the seam position to Aligned back, then rotate the model so the seam faces away from view. Or enable the scarf joint seam, which ramps the layers together so the seam nearly disappears. Calibrating pressure advance first makes any seam cleaner.
What is a scarf joint seam?
It is a seam that overlaps the end and start of each layer on an angled ramp instead of stopping abruptly. The join is blended rather than stacked, so it gives the least visible seam. It works best on smooth curved models and is still marked beta.
What should I set the seam gap to?
Between 0 and 15 percent of the nozzle size on a well-tuned printer. A larger gap reduces bulging at the seam; too large leaves a visible gap that looks like under-extrusion.
Why do my seams have blobs?
Usually pressure advance needs calibrating. Too little leaves pressure in the nozzle that blobs at the seam. Run a pressure advance calibration, then raise travel speed and enable wipe before the external perimeter.