


Orca Slicer support settings, explained
Supports are temporary structures the printer builds under steep overhangs and bridges, so plastic is not printed into thin air. Any part of a model that hangs out too far has nothing to rest on, and without support it droops or fails. Supports hold those areas up, and you break them off after the print. The trade is that they cost material and time and leave marks where they touch. So the aim is to use as few as you can, and to set them up so they come off cleanly. Orca Slicer gives two support systems and a set of settings that control how they print and how easily they remove.
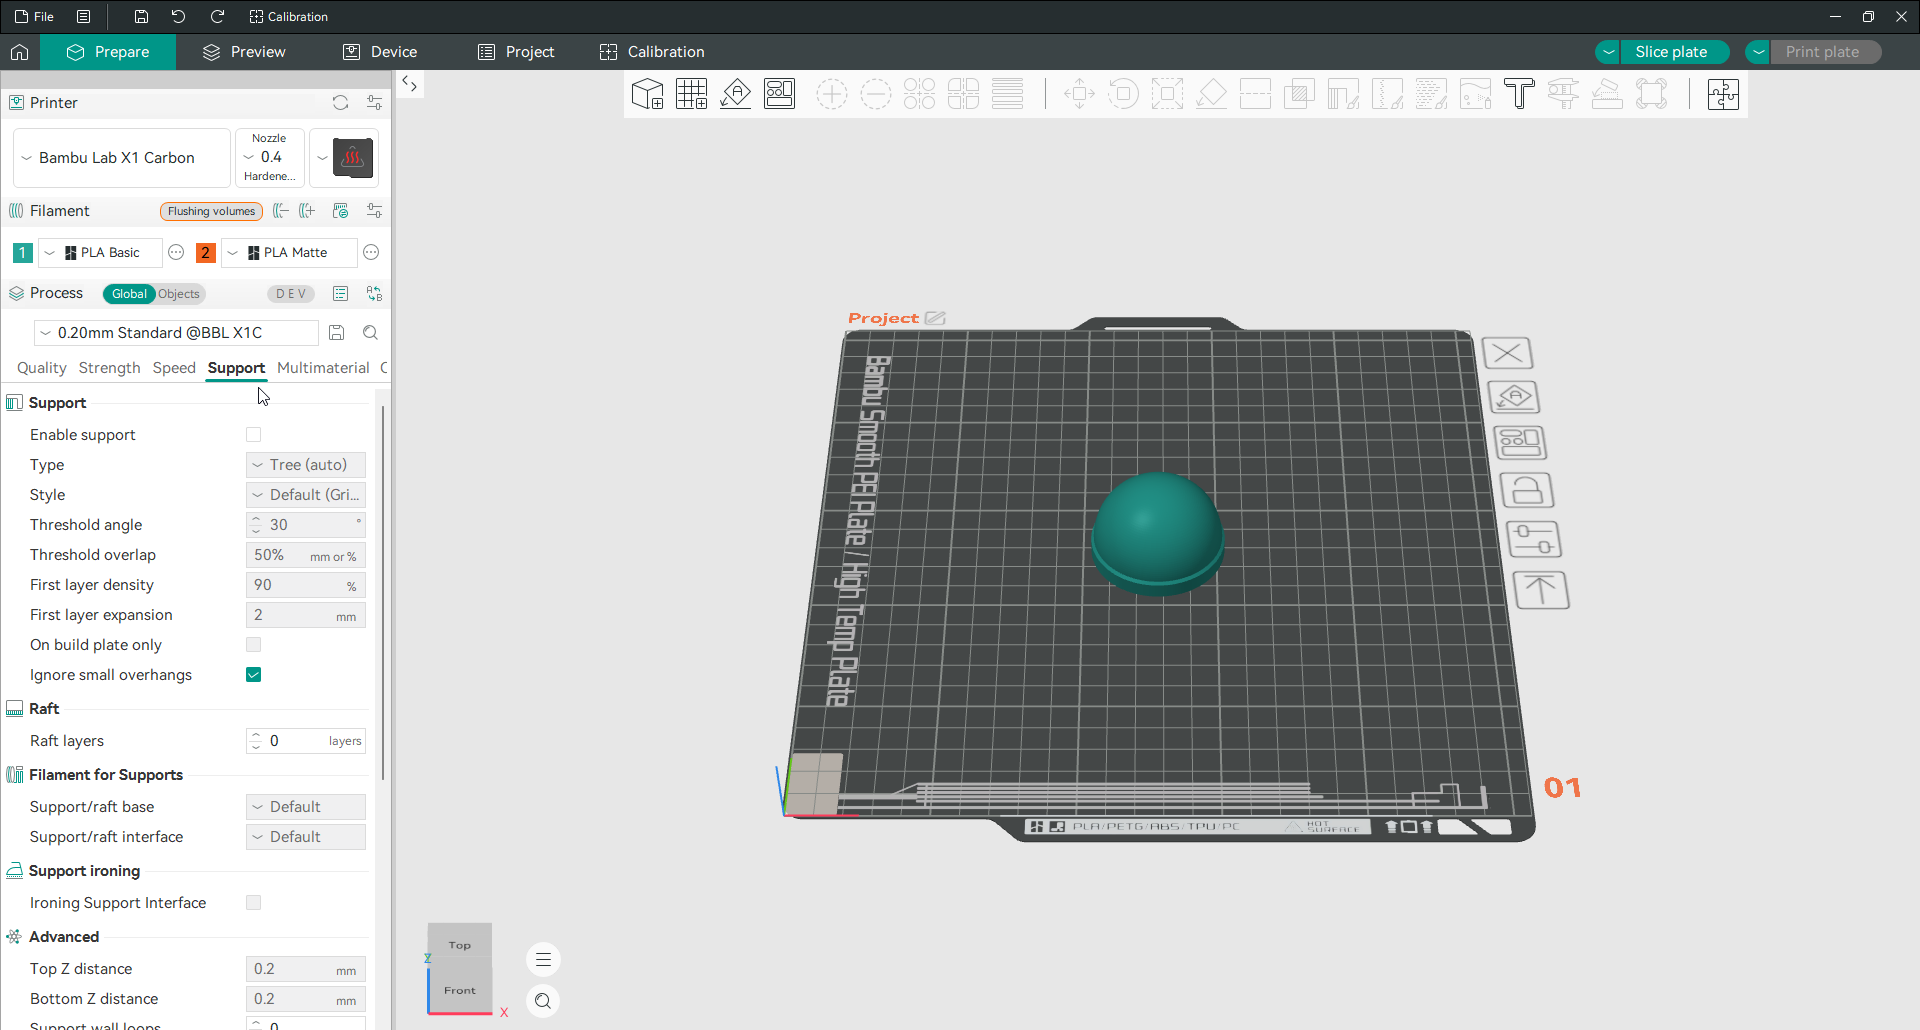
You will find them in the Support tab. Turn on Enable support in Orca Slicer to switch them on, then set the type and the settings below.
Normal or tree supports
In OrcaSlicer the Type setting picks between the two systems. Normal supports build a straight grid of pillars up from the plate or the model to whatever sits above them. They are predictable, slice quickly, and give a solid base under wide, flat overhangs. That suits brackets, flat shelves and figure bases. Tree supports instead grow branches that reach up to the overhangs like a trunk splitting into limbs. They use less material, touch the model in fewer places, and pull off more cleanly. That makes them ideal for figurines and organic shapes. Their weakness is wide flat overhangs, where a grid holds better.

Both types come in an auto version, where the slicer decides where support goes, and a manual version, where you paint it on yourself for full control.
Support style
Style changes the shape of the chosen type. For normal supports, Grid is the default. It projects a connected, sturdy grid. Snug instead follows the outline of the model, which saves material and reduces marks on the surface. For tree supports, Organic is the default and merges the branches to save material. Slim makes thinner, more delicate branches, and Strong makes thicker ones for heavy overhangs. There is also Tree Hybrid, which uses a normal grid under wide flat overhangs and branches elsewhere. For most prints Organic works well; reach for Snug on tall normal supports that wobble, and Strong when Slim branches keep breaking.
Threshold angle
The threshold angle decides how steep an overhang has to be before it gets support at all. Gentle overhangs print fine on their own, so only the steep ones need help. A value around 30 to 50 degrees suits most setups, and the material matters. PLA on a good printer holds a steeper angle before it needs support, while ABS and ASA droop sooner and want more. The reliable way to set it is to print an overhang test once for each filament and use the angle where your prints start to sag. Ignore small overhangs, on by default, skips tiny areas that do not really need propping up.
The gaps: Z distance and XY distance
These two settings matter most for whether supports help or ruin a surface. The top and bottom Z distance is the vertical gap between the support and the model, and it is the classic trade-off. Too small and the support fuses to the print and tears the surface coming off; too large and it removes easily but leaves the overhang rough and droopy. Around 0.2 mm works for PLA, and stickier materials like PETG want a little more. Many people find 0.2 to 0.25 mm the sweet spot for clean removal. The support to object XY distance is the horizontal gap between the support and the model’s walls, which keeps side supports from scarring vertical faces.
Interface layers for clean surfaces
The interface is the set of dense layers at the very top of the support, right under the model, and it is what decides how smooth the supported face comes out. A couple of top interface layers, the default, give the overhang a solid surface to print onto instead of a gappy grid. They still peel away. Keep at least two. The interface spacing controls how tightly packed those lines are, where a smaller number is smoother and zero is fully solid. Rotating the interface pattern angle so its lines do not run along the model’s own layers also helps the support snap off more easily. If you need a very clean underside, Support ironing smooths the interface top. Filament for supports lets you print the interface in a different or soluble material for easier removal.
Raft and other options
A raft is a full raft of layers printed under the whole model, set by Raft layers and off at zero by default. It adds adhesion and fights warping on small or warp-prone parts, but it uses extra material and time, so a brim is usually the lighter fix. The remaining options tune the support base and structure. First layer density and expansion anchor the base to the plate, and the base pattern and spacing set how the body of the support is drawn. Don’t support bridges skips support under spans the printer can bridge on its own. If an overhang is only just too steep, the Make overhangs printable option on the overhangs page can reshape it slightly so it prints without any support.
Frequently asked questions
Should I use normal or tree supports in Orca Slicer?
Use normal supports for wide, flat overhangs like brackets and shelves, where a solid grid holds best. Use tree supports for figurines and organic shapes, since their branches use less material, remove more cleanly, and leave fewer marks. For a model with both, Tree Hybrid or normal supports are the safer choice.
What is the best support Z distance?
Around 0.2 mm suits PLA, and many people settle between 0.2 and 0.25 mm for clean removal. It is a trade-off: a smaller gap gives a better surface but fuses the support to the print, and a larger gap removes easily but leaves the overhang rougher. Stickier materials like PETG usually need a slightly larger gap.
Why are my supports so hard to remove?
Usually the Z distance is too small, so the support has bonded to the model. Raise it a little, keep at least two interface layers so the contact is a clean surface rather than a fused grid, and rotate the interface pattern angle so its lines do not line up with the model’s layers. Those three changes fix most removal problems.
What threshold angle should I use for supports?
A value around 30 to 50 degrees covers most prints, but the right one depends on your printer and filament. PLA on a tuned machine holds a steeper overhang before it needs support, while ABS and ASA sag sooner. Print an overhang test once per filament and set the threshold to the angle where your prints start to droop.
How do I get cleaner surfaces under supports?
Add top interface layers, keep the interface spacing tight, and set the Z distance no larger than it needs to be for removal. Support ironing smooths the interface further, and printing the interface in a soluble filament removes the marks entirely. Tree supports also tend to leave cleaner undersides than a full grid.